Multiple Product Mapping
Multiple Product Mapping in Acodei gives you control over how your Stripe transactions sync into QuickBooks. Whether you sell different products, offer multiple subscription tiers, or use platforms like Kajabi or Thinkific, this feature helps you categorize income, fees, and refunds accurately in QuickBooks.
What Is Multiple Product Mapping?
By default, all Stripe payments sync into a single QuickBooks product. But if you sell multiple products or services, or want to separate different income sources, you likely need more granularity.
Multiple Product Mapping (MPM) allows you to:
-
Map Stripe transactions to different QuickBooks products/services
-
Match transactions based on Product ID, metadata, description, price, or Stripe account
-
Maintain a clean and accurate chart of accounts
How It Works
When a Stripe transaction is received, Acodei checks your list of mapping rules in order (from top to bottom). The first rule that matches is applied. You can:
-
Combine multiple rule types (e.g., Product ID, Metadata, Description)
-
All products mapped will be evaluated from top to bottom on our Multiple Product Mapping list. Prioritize more specific rules by moving them higher in the list
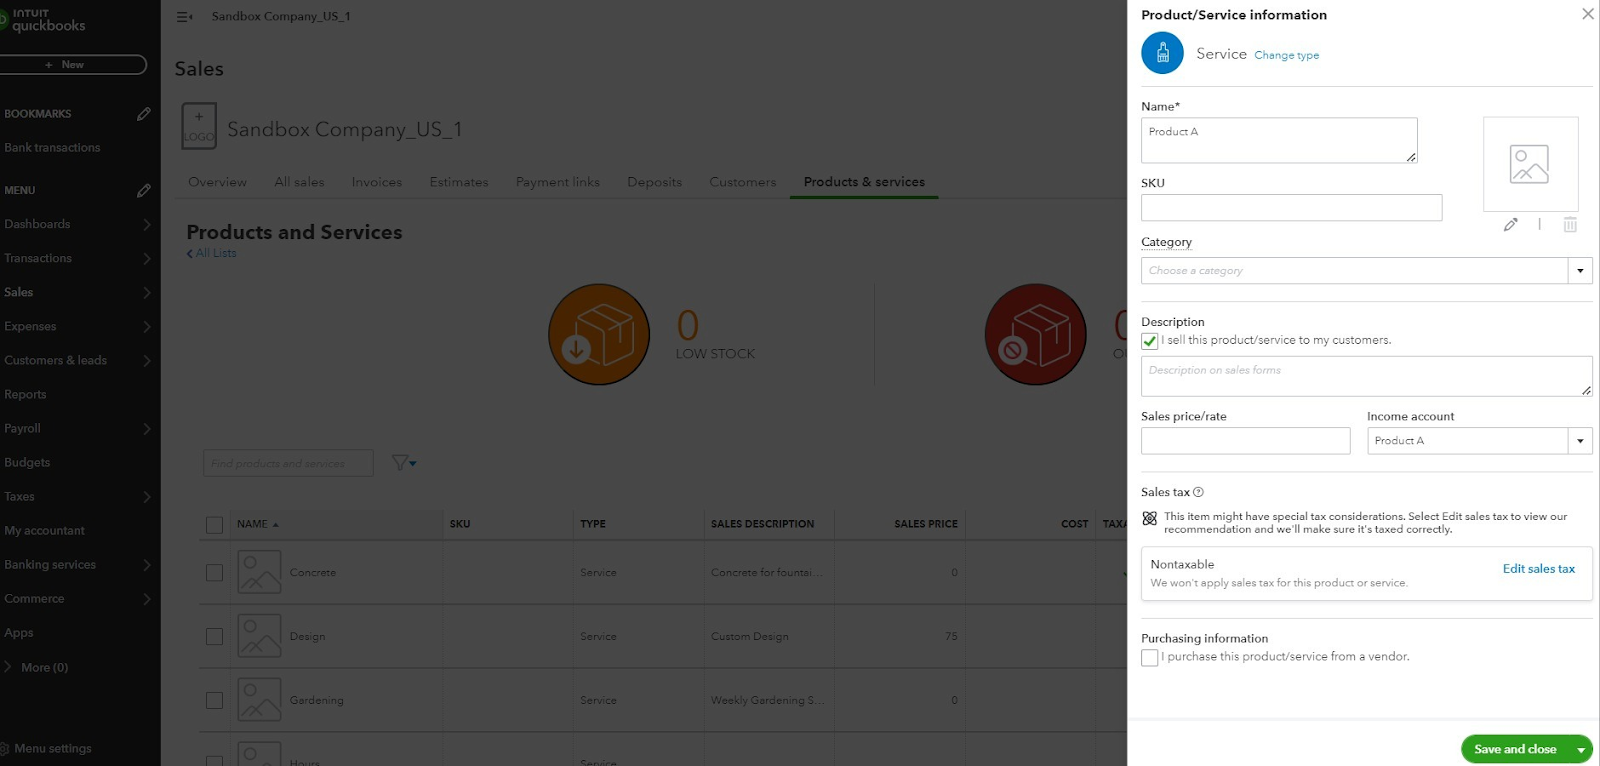
Managing Products in QuickBooks Online
To implement multiple product mapping in QuickBooks, it's essential to understand QuickBooks Products. Product mapping is necessary for creating Sales Receipts and Invoices.
To create a new product, follow these instructions.
For US-based companies, ensure the product is nontaxable, as sales tax is handled elsewhere.
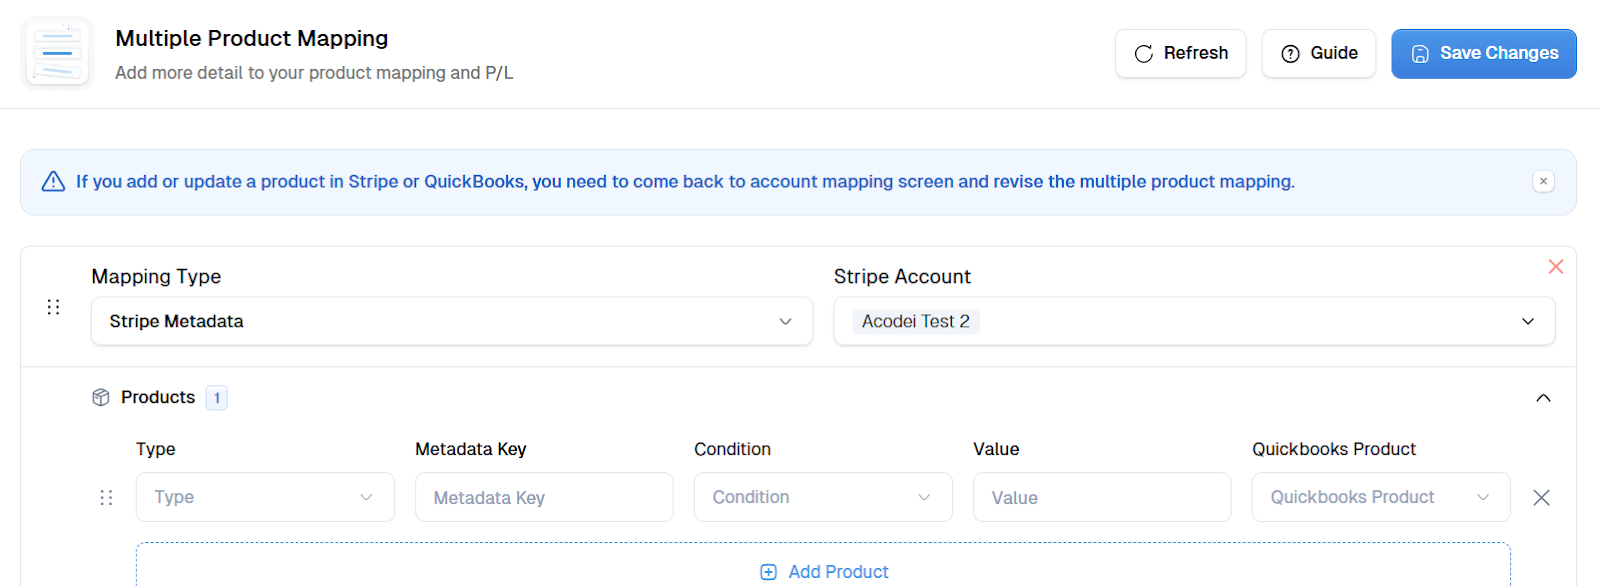
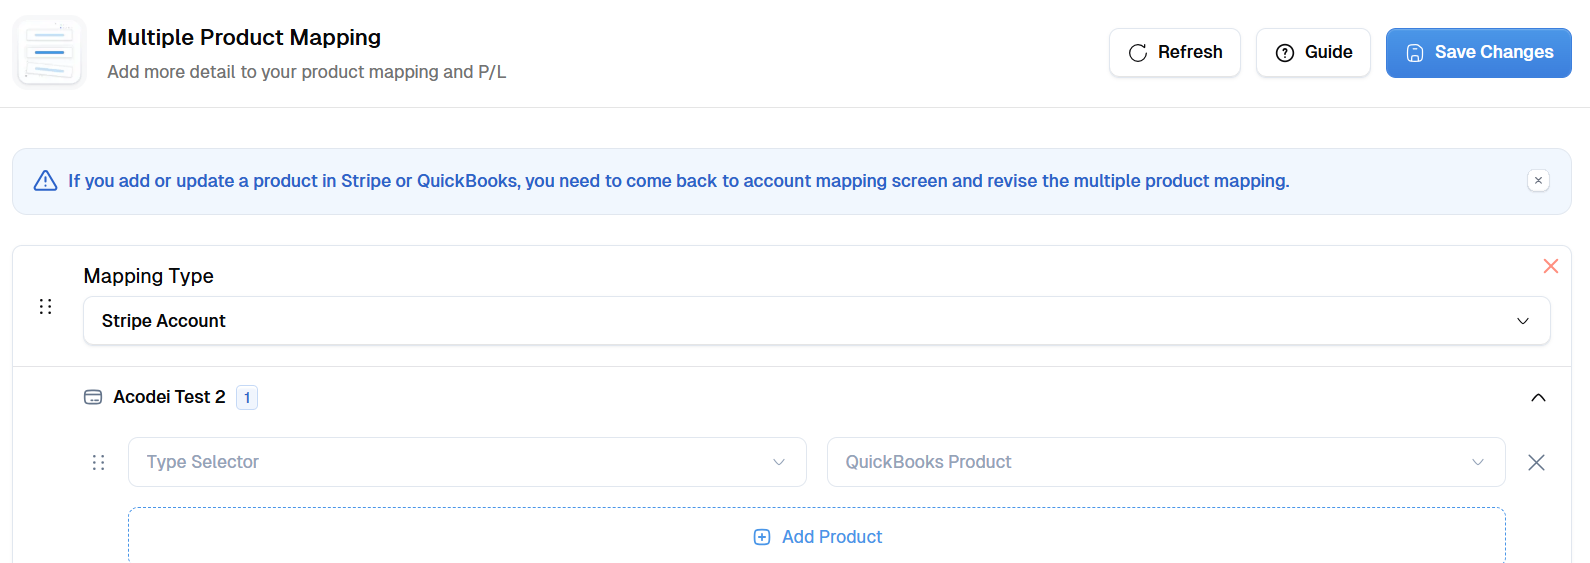
Your product mapping may resemble the image provided below.
Different Ways to Map
You can use any combination of these rule types:
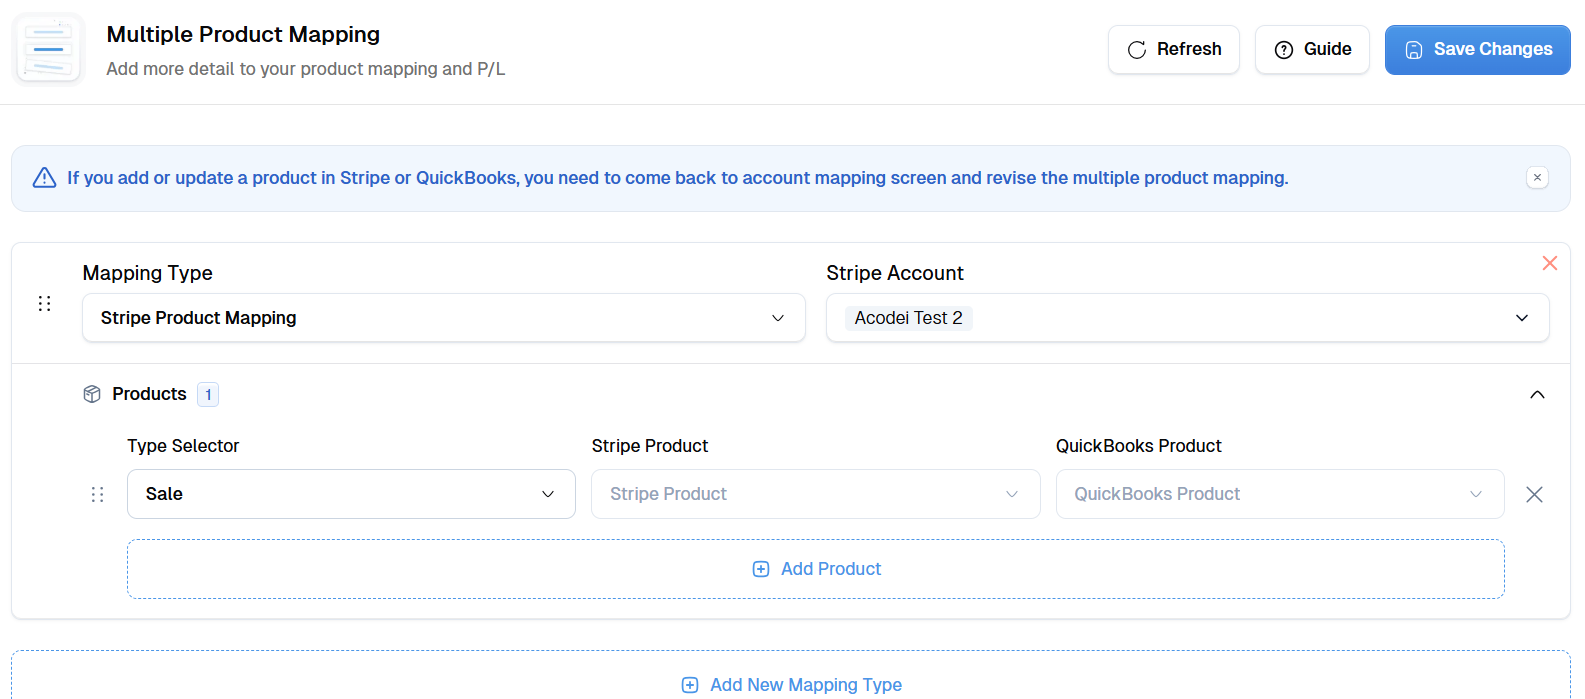
1. Stripe Product Mapping
Stripe Product Mapping is the only mapping type that allows for mapping multiple line items separately on one transaction in QuickBooks.
There are three different ways to map using Stripe Products:
-All Prices (Product ID Only)- This option maps all Stripe prices associated with a given Product ID to a single QuickBooks product.
-
Best for: Simple products with one or more price tiers that don’t need to be separated in your books.
Acodei will sync any charge tied to this Product ID, regardless of the Price ID used. You don’t have to specify a price; the rule applies to all of them.
If your Stripe product “Online Course” has monthly and yearly prices, both will map to the same QuickBooks product.
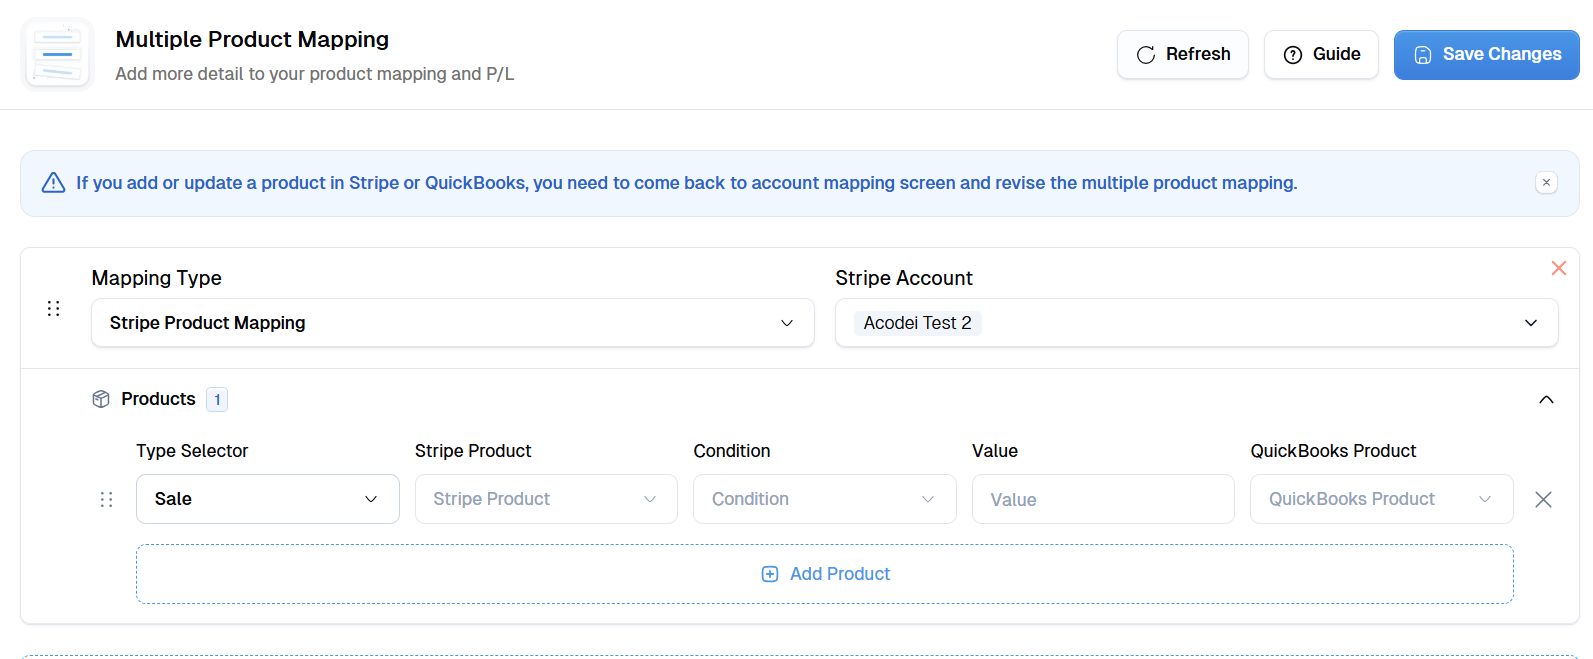
This option allows you to match one Stripe product to multiple QuickBooks products based on the Stripe price, using conditions like:
- Equal to
- Greater than
-
Less than
-
Best for: Cases where prices for one Stripe product vary or you're using dynamic pricing and want to categorize based on value thresholds.
You might create a rule like: “If price is greater than 5000, map to Premium Product.”
-
This is the most specific option. It maps a transaction to a QuickBooks product only if it exactly matches a Stripe Price ID.
-
Best for: Subscriptions with multiple billing tiers (e.g., monthly, annual, regional) where each needs its own line in QuickBooks.
Acodei will only apply this rule when a charge or invoice contains this exact Price ID.

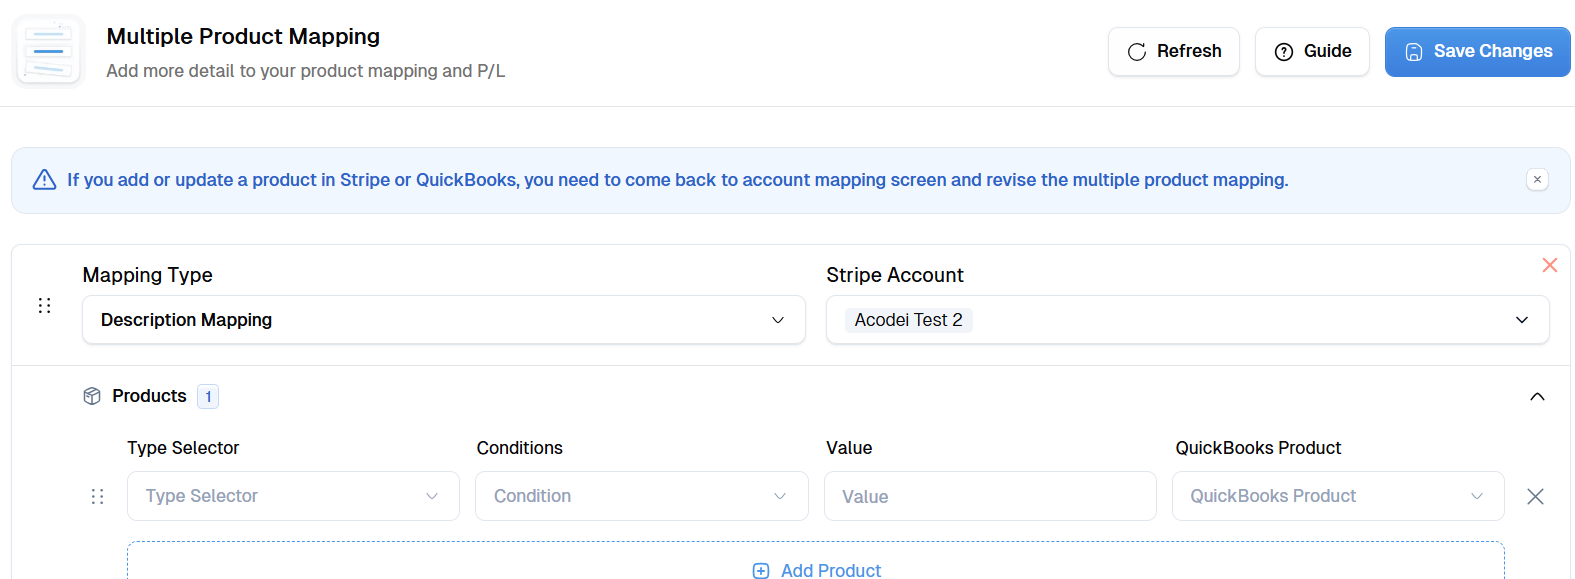
2. Description Matching
Matches transactions by checking if the Stripe description contains specific text.
To match a product in QuickBooks, use the description field in Stripe transactions. This field is mapped on the charge, payment intent, and subscription webhooks. The field is configured through code or by a third-party app connected to Stripe. If yours is blank or has default text (Payment for Invoice, Subscription Update, and Subscription Creation), work with your developer or a third-party app to fill the field with a successful charge.

We parse the mapping list from top to bottom for all product mapping. So, make sure you list your items accordingly. With this in mind, Description mapping is not recommended for complex mapping with many products because text-based matching has limitations and can be error-prone.
3. Transaction Value
Utilize the transaction value mapping in special cases where you want to match products that consistently have the same value. For instance, if you have three tiers of transactions - a $9 tier, a $19 tier, and a $29 tier - you can assign each of these unique values to a specific product and income account. Generally, this mapping type should only be used if you have a small number of products with values you plan to keep the same.
-
We use the gross amount (before fees).
-
For multi-currency contexts, the system checks the currency first. If the transaction is $9.99 USD, it must match a rule also set to USD 9.99. Otherwise, it fails the match.
4. Stripe Metadata
Matches transactions based on custom metadata attached to charges, subscriptions, or invoices.
Typically, with assistance from a developer, you can create Stripe metadata on charges similar to the example shown in the image below.
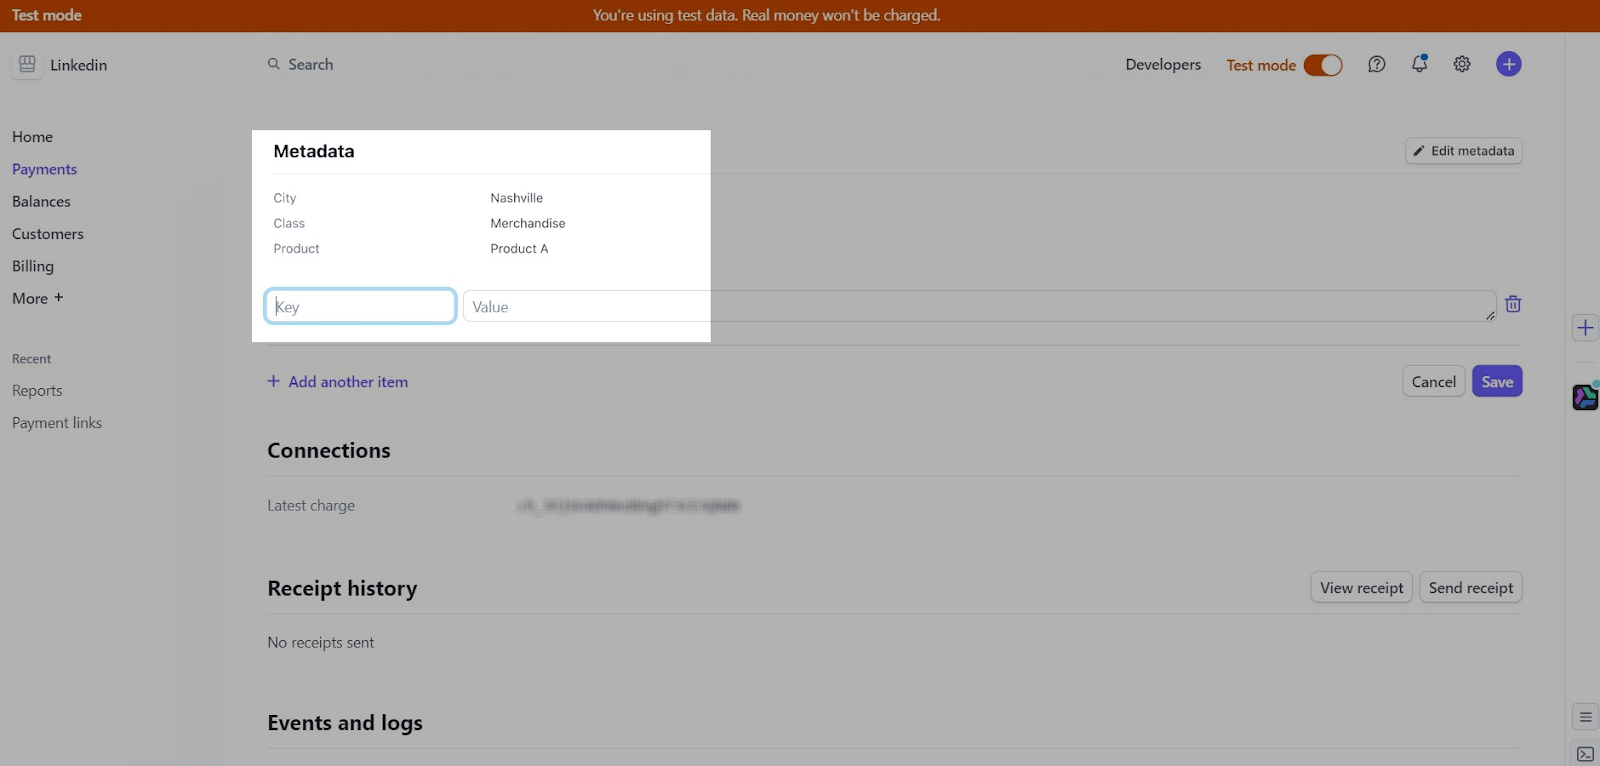
With the Stripe Metadata Mapping option, you can link Keys (the value on the left) and Values (the value on the right) to specify the QuickBooks product you want to map. This can be useful in various situations, particularly when combining multiple elements requires a more intricate connection than what description mapping can offer alone.
5. Stripe Account ID
If you have multiple Stripe accounts connected, you can choose to map transactions based on which Stripe account they come from. For instance, if you have two Stripe accounts - Stripe account A and Stripe account B - you can assign all transactions from Stripe account A to a Consulting product, and all transactions from Stripe account B to the Merchandise product.
Mapping Refunds and Fees
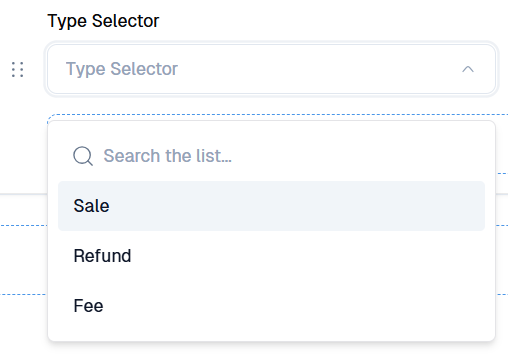
Mapping Refunds and Fees follows the same rules (and uses the same Mapping types) as Multiple Product Mapping for sales as explained above. Simply select Refund or Fee in the Type selector:
Refunds (Advanced)
You can use Multiple Product Mapping to control how refunds are posted in QuickBooks.
By default, Acodei attempts to post refunds to the original mapped product (e.g., if Product A was sold, refund goes to Product A). However, you can also:
-
Use Multple Product Mapping to map specific refunds
-
Enable the admin option: “Always route refunds to the default refund product.” This must be done on the backend, so email support@acodei.com to have it enabled on your account.
| Scenario | Refund Posting Behavior |
| Partial refund (1 item) | Refund posts to original product |
| Partial refund (multiple items) | Refund posts to default refund product |
| Full refund (1 item) | Refund posts to original product |
| Full refund (multiple items) | Refund posts to default refund product |
| Override enabled | All refunds post to default refund product |
If you enable Multiple Product mapping for Refunds, then you can map refunds for specific Stripe products/transactions to a specific QuickBooks Product (not the original product or the default refund product).
Multiple Product Mapping Refund Behavior:| Scenario | Refund Posting Behavior |
| Partial refund (1 item) | Refund posts to QuickBooks product used in MPM for refund |
| Partial refund (multiple items) | Refund posts to the specific product that the refunded item was mapped to in MPM |
| Full refund (1 item) | Refund posts to QuickBooks product used in MPM for refund |
| Full refund (multiple items) | Refund posts to the specific products that the refunded item was mapped to. |
Stripe Fees (Advanced)
If you set up Multiple Product Mapping for fees, you can also map Stripe fee entries to a specific QuickBooks Product/Service.
Why Rule Order Matters
You can have multiple rules that a transaction could match, but only the first match is used.
Example:| Rule Order | Match Type | Criteria | QuickBooks Product |
| 1 | Description contains | "Course" | General Course |
| 2 | Product ID | prod_ABC123 | Premium Course |
If a charge includes “Course Level 2” in the description and also has Product ID prod_ABC123, Rule 1 applies and overrides Rule 2—unless you move Rule 2 higher.
Use the drag handle (dots on the left of the mapping) in the UI to reorder your rules.
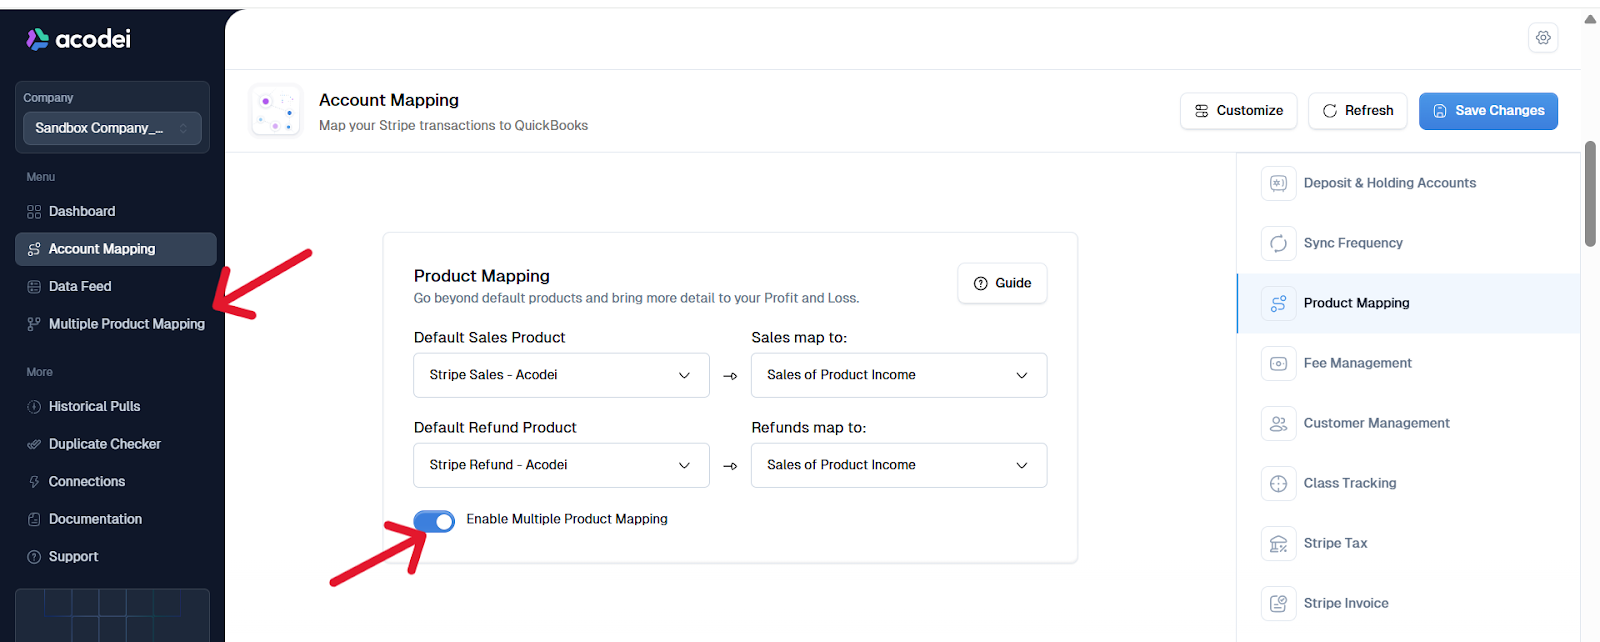
How to Set Up Mapping Rules
-
Go to Account Mapping in your Acodei dashboard.
-
Scroll to Product Mapping and enable Multiple Product Mapping:
-
Click on Multiple Product Mapping on the left-side menu.
-
Click Add New Mapping Type
-
Select a mapping type (e.g., Product ID, Metadata).
-
Select a Stripe account (if you have more than one Stripe account connected).
-
Select a transaction type (sale, refund or fee).
-
Input match criteria (e.g., prod_ABC, metadata:course_type=premium).
-
Choose the corresponding QuickBooks product/service.
-
Click Save.
-
Drag to reorder rules for priority (dots on left of mapping rule).
App-Specific Examples
Thinkific
-
Copy your Thinkific Product ID from the course link.
-
Add a mapping rule in Acodei using that Product ID.
-
Map it to a QuickBooks product tied to your income account.
Kajabi
-
Locate the Offer ID from the Kajabi course URL.
-
Map each offer to a distinct QuickBooks product in Acodei.
-
The system pulls in your recent offers automatically on setup.
Best Practices
-
Most specific rules go first
-
Place broad rules like “description contains” lower in the list
-
Update rules if Stripe products or prices change
-
Test changes with small transactions first
-
Monitor for failed/incorrect mappings
Troubleshooting
| Issue | Likely Cause | Fix |
| Transaction mapped to default product | No matching rule or incorrect value | Check rule criteria or reorder |
| Wrong QBO product used | Generic rule above specific one | Drag specific rule higher |
Summary
Multiple Product Mapping gives you detailed control over how your Stripe transactions—including sales, refunds, and fees—post to QuickBooks. Whether you're selling a few digital products or running a complex multi-tiered platform, this feature ensures your financials stay organized.
Key Takeaways:-
Only the first matching rule is used—order matters.
-
Combine different mapping types for flexibility.
-
Refunds and fees can be routed using the same rule system.
-
Contact support@acodei.com if you need help configuring complex rules.